After releasing the first version, I did not tell what has changed since the last beta.
Between 0.45 and 1.0 versions have passed the whole 2 months, 0.45 seems already very uncomfortable.
So what has changed and added?
--- Full and Lite ---
Firstly, free useing is not over. Versions were divided, now there is Full and Lite version.
Full costs $20 per year + all updates during his year (30 days for free demo)
Lite is always free, it's a stripped-down Full Edition: only 1 layer (object in the scene), CTRL + Z is limited to 8th actions, and most important - you cann't save and load brushes (all possibilities of creating and modifying brushes exactly the same, you just can't save them)
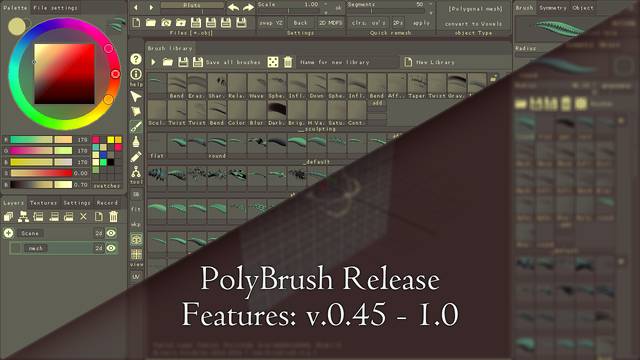
--- Interface ---
Two brushes to quick switch, like 2 colors in pallete
Ability to reassign hotkeys by user (Settings / Edit hotkeys mode)
Brush library panel moved to separate window that opens by F5 (default) or by pressing < button at brush panel.
Therefore "Edit" panel was renamed to "Brush" and now became first panel at right side, so all settings of selected brush visible immediately
Workplane settings panel moved to bottom of screen
Tools panel became vertical and moved to left of viewport
Because place on top been cleared, the height of the side panels increased to its maximum
Added strip with Workplane action history and line with name and hotkeys of the selected tool
Scrolling with right mouse buttons at panels
Reset sliders value using spacebar
--- Workplane ---
Position is defined now by rotation angles, not using vector. So you can choose angle using the sliders at panel.
Workplane deformation, separate for X and Y axis
Workplane radius increase/decrease by step, it helps to see workplane position better when moving
Workplane radius in screen now don't depend from camera FOV
Ability to separate whole scene to cells like in game map editors. It enables in Snap\World Divs\. In this case workplane reset will move it to center of most closest cell.
Workplane surface of follows cursor to make infinity of workplane more obvious
--- Voxels ---
Now you can draw inside remesh, so to speak. Use all brushes or other tools and remesh be applied after each stroke.
To covert object to voxels use button with that name at 'Object' panel or at Top of ui. Remesh smoothing also working for voxels.
--- Screen recording ---
You can record Polybrush window without using third party software.
Huge convenience of such recording is that you can adjust the speed when drawing, when the cursor is outside the viewport, and it automatically pauses if you don't move cursor.
And most importantly, when you press CTRL + Z required part of video is removing together with the canceled action (if necessary).
Video is recording to TGA frames sequence (without compressing)
--- Mesh ---
Solved problem with normals export. Previously, after importing objects from Polybrush some normals could be directed in the wrong direction.
If the problem persists with the old scenes, it can be solved, using modifier Normals/Quad Reverse parameter.
(In fact problem it's not only in the direction of normal vectors, problem in the order of vertices inside the polygon)
You can seperate object to separate parts by one click - Object/Explode.
For example if you drawn chain using brushes and want to separate it to chain links.
--- Other ---
Appeared not a perfect but an easy way to export Polybrush vertex colors as texture to other programs.
There are texture: Polybrush\Data\All_colors.png with all possible colors, Brightness value - by vertical, Hue value - by horisontal. Saturation is same at all image.
When export (if it enabled in File settings) texture UV-coordinates for every vertex is defined as: U is brigthess value, V is hue value.
So when you import polybrush model in other software you can just assing All_colors.png texture to it to assign Polybrush colors.
But saturation will be identical, equal to 100%. It's better to change texture saturation to the desired value.
All Polybrush settings, ui theme, colors swathes are saved when restart.
Also sculpting became much more better. So there are much more changes, but I can't remember all of them :)
http://polybrush.org/
|